Last Updated on September 27, 2024 by ETC Team

Any outdoor enthusiast understands that there are many skills they need to learn in order to make the most of their adventures. Whether you are just getting into camping or seasoned in all things outdoors with hundreds of trips under your belt, one of the basic skills every camper needs to know is how to tie knots. There are 6 essential camping knots to learn.
For starters, you’ll be using knots to tie down your tent. Perhaps you’ll use knots to hang a hammock or clothesline. In some cases, you may even need knots to rescue someone.
The good news is that you don’t need to learn all of them. Thus, all you really need to know for camping are these 6 basic outdoor knots that we’re going to show you how to tie.
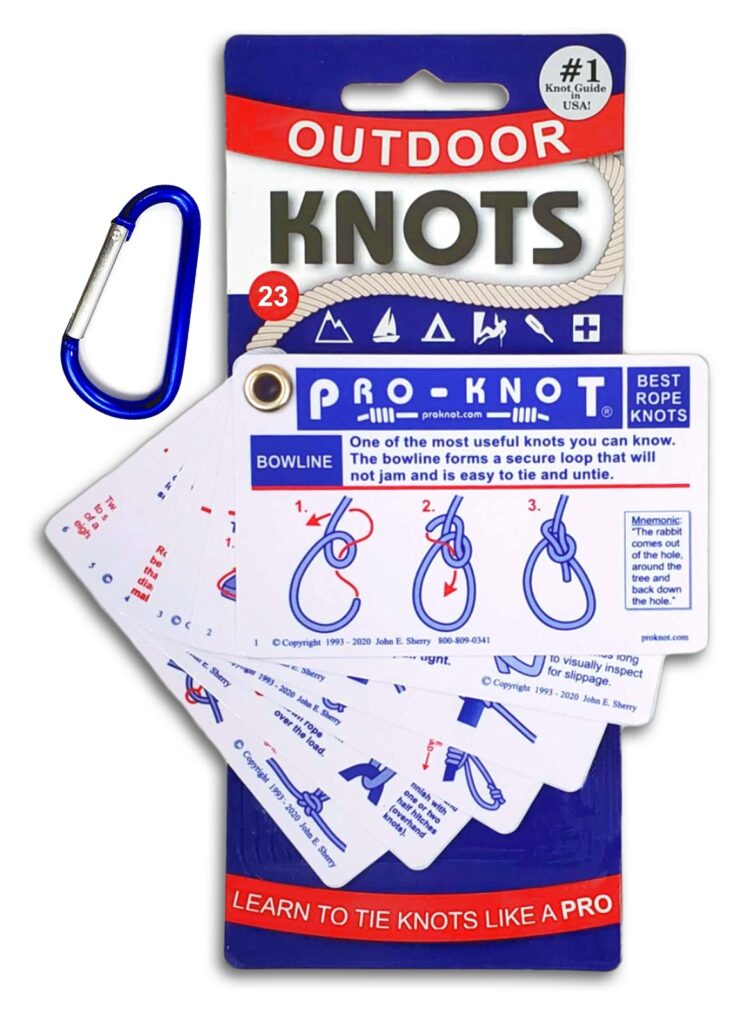
CARRY A CHEAT SHEET: Worried that you’re going to forget how to tie them at camp? This Pro-Knot Outdoor Knots waterproof instruction booklet is the perfect thing to bring to camp. It includes instructions for 23 knots including the 6 that we’re going to show you.
Learn The Terminology
Before we begin, let’s go over some of the key terms (along with their meaning) that we use in our instructions for 6 essential camping knots:
Knot — a fastening made by tying a piece of rope.
Hitch — a knot used for fastening a rope to an object—like a tree, post, carabiner, or even another rope.
Bend — a knot that attaches two ropes together.
Standing End — the part of the rope that is not active in tying knot.
Working End — the part of the rope that is active in tying knot—the moving piece.
6 Essential Camping Knots
1. How To Tie A Bowline
The bowline knot is considered by many to be the best all-around knot that outdoor enthusiasts should know. You’ll find yourself using this knot frequently hence it’s no surprise that it is first on our list of essential camping knots.
The bowline is a secure knot. It will not slip under heavy load, which is why this knot can be tied around the body for rescue purposes or mountain climbing.
Best uses at camp: tying a rope to a pole or tree, hanging a hammock, hanging a bear bag, rescuing someone.

The bowline knot is usually taught using the “rabbit story”:
- Make the rabbit hole.
- The rabbit comes up through the hole.
- Rabbit runs around the tree.
- The rabbit hops back into the hole
- And through to the other side.
- Tighten and the Bowline knot is made
2. How To Tie A Half Hitch
A half hitch is likely something you tied before. The working end of the rope is wrapped around an object (perhaps a tree) then over and under (or under and over) the standing end, then tightened.
The half hitch is often used in conjunction with another knot. However, on its own, it’s liable to give way. But it can be used in a supporting role by increasing security to a primary knot.
Most of the time, you would be tying two half hitches instead of one. The important thing to remember when you’re tying two half hitches is that both of them are the same. So if you bring the working end under then over the standing end, make sure the second half hitch also goes under then over.
Best uses at camp: tying a rope to a pole or tree, finishing another knot.
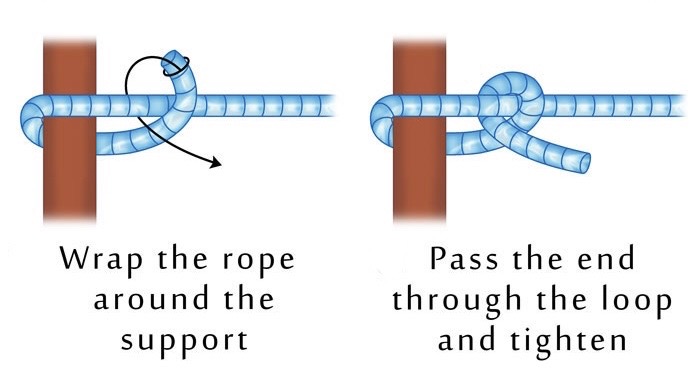
- Wrap the rope around the object.
- Put the working end under the standing end.
- Put the working end over the standing end and through the loop.
- Tighten and the Half Hitch is made.
3. How To Tie A Clove Hitch
The clove hitch is a very easy knot to tie. When used alone, it slips. Nonetheless you can increase the security of this knot by finishing it with two half hitches.
Best uses at camp: hanging a clothesline.
- Wrap the rope around the object.
- Bring the working end back over the object.
- Bring the working end under the object, then over the object and under the rope itself.
- Tighten and the Clove Hitch is made.
4. How To Tie A Square Knot
The square knot goes back thousands of years. It’s used to tie two ends of a single rope together.
We frequently see the square knot being used to tie two ropes together, but we do not recommend this because it’s not a bend – it’s not secure enough for holding two ropes together.
Because of the way it flattens when pulled tight, the square knot is perfect for tying packages. Furthermore, it is very useful in first aid applications.
Best uses at camp: bandaging wounds, tying trash bags.
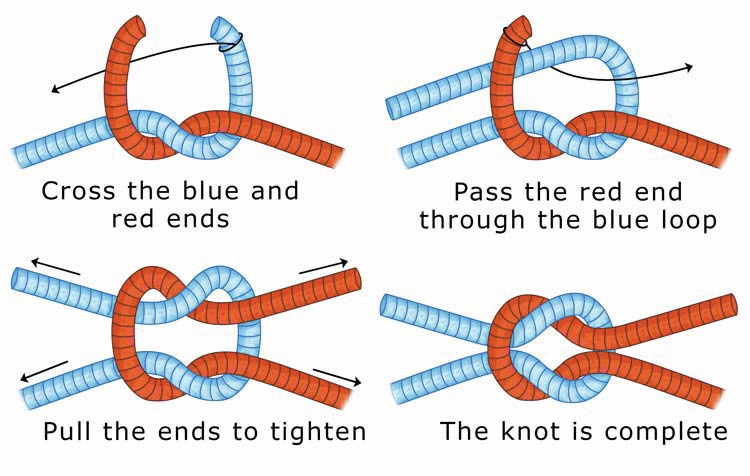
- Put working end #1 over working end #2.
- Bring working end #1 under and over working end #2.
- Put working end #1 over working end #2.
- Bring working end #1 under and over working end #2.
- Tighten and the Square knot is made.
5. How To Tie A Sheet Bend
The way to tie two ropes together is by using a sheet bend. A sheet bend works even if two ropes are of different sizes and materials.
Step 3 in our instructions can be repeated to make a double sheet bend for greater security, especially when using a plastic rope. But in most cases, a single sheet bend is sufficiently secure.
Best uses at camp: combining two ropes to make a longer rope when a single rope isn’t long enough.
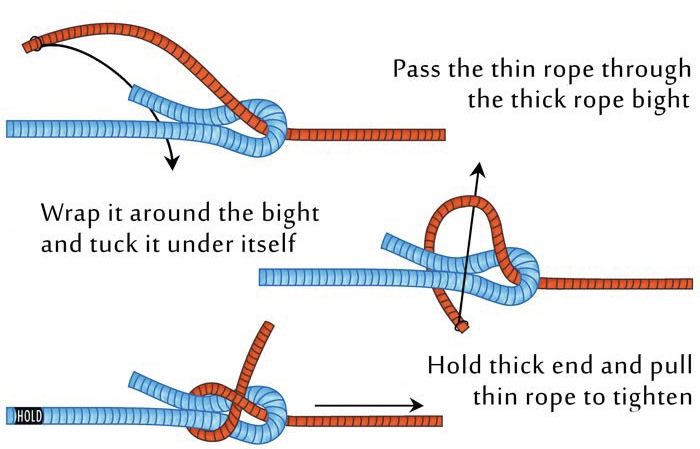
- Make a loop with rope #1 and pass rope #2 under and through the loop.
- Wrap rope #2 behind rope #1.
- Bring rope #2 over rope #1, under itself, then over rope #1.
- Tighten and the Sheet Bend is made.
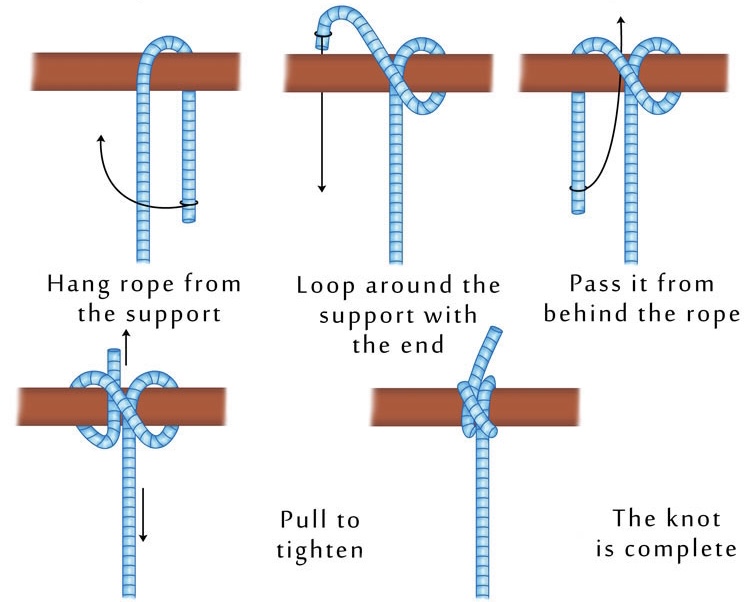
6. How To Tie A Taut Line Hitch
Last on our list of essential camping knots you should know how to tie is the taut line hitch. Before you head out on a camping trip, this is a knot you will want to be familiar with. This will be the hitch you use to anchor your tent guy lines.
This hitch can be tied around a tree or tent stake. It slides freely so you can adjust the tension in the rope as needed, yet this hitch will jam under load.
When tying a taut line hitch, it’s important to tighten the rope neatly so that it slides easily.
Best uses at camp: securing guy lines for a tent or tarp.
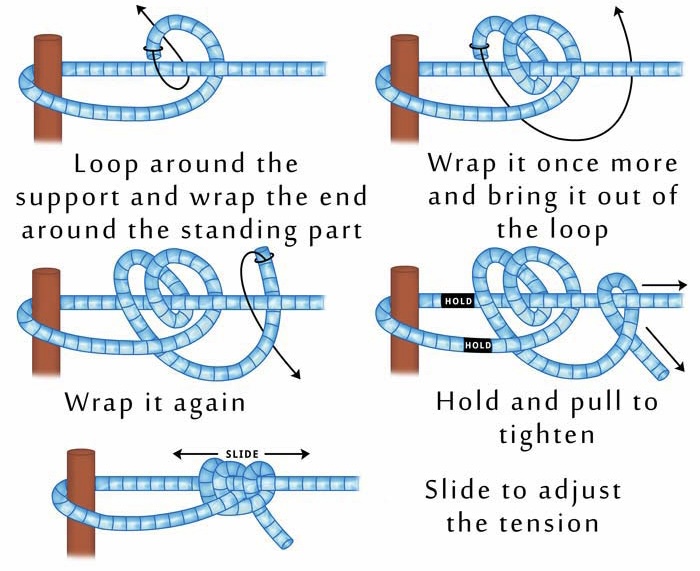
- Wrap the rope around the object.
- Put the working end through the loop.
- Put the working end through the loop a second time.
- Pull the working end under the standing end.
- Wrap the working end around the standing end.
- Tighten and the Taut Line Hitch is made.
6 Essential Camping Knots
There are hundreds of knots you can learn for camping, and at first, trying to learn them can be overwhelming. If you are new to the craft of tying camping knots, begin by trying to master these 6 essential camping knots. You’ll find yourself using these during your camping adventures and before you know it, learning to tie more difficult knots will become easier.